
What is a Facebook Event?
A Facebook Event is a free tool that lets you organize and promote gatherings, both online and offline. It’s built right into Facebook, allowing you to invite people, track RSVPs, and engage with your audience before, during, and after the event.
Why it’s useful:
- Helps reach your existing followers easily
- Sends automatic reminders to attendees
- Allows you to engage with your audience in the event page
- Boosts visibility when shared, liked, or marked as “Interested” by others
Whether you’re hosting a local meetup or a virtual class, Facebook Events give you a professional and effective way to get people involved.
Why Should You Use Facebook Events for Your Business?
Creating a Facebook Event is a simple and powerful way to reach more people and boost attendance. Whether you’re hosting a local meetup, launching a new product, or going live with an online workshop, Facebook gives you the tools to manage everything in one place. If you’re wondering how to create Facebook events, this step-by-step guide will walk you through the entire process — from setup to publishing — in an easy and beginner-friendly way.
Step 1: Go to Facebook Events
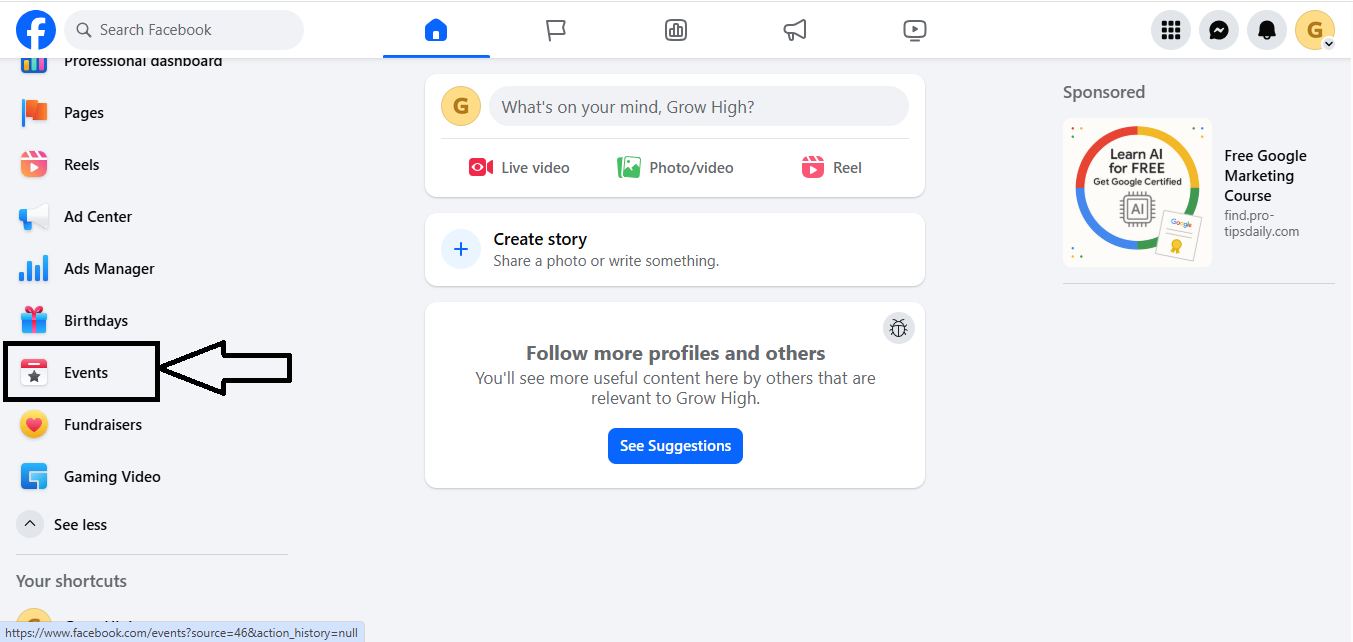
To begin, log in to your Facebook account and go to the left-hand menu (on desktop) or tap the menu icon (on mobile). Select “Events” from the options. If you don’t see it right away, use the search bar to type in “Events.” This is the main hub for creating and managing your events on Facebook.
Step 2: Click “Create New Event”
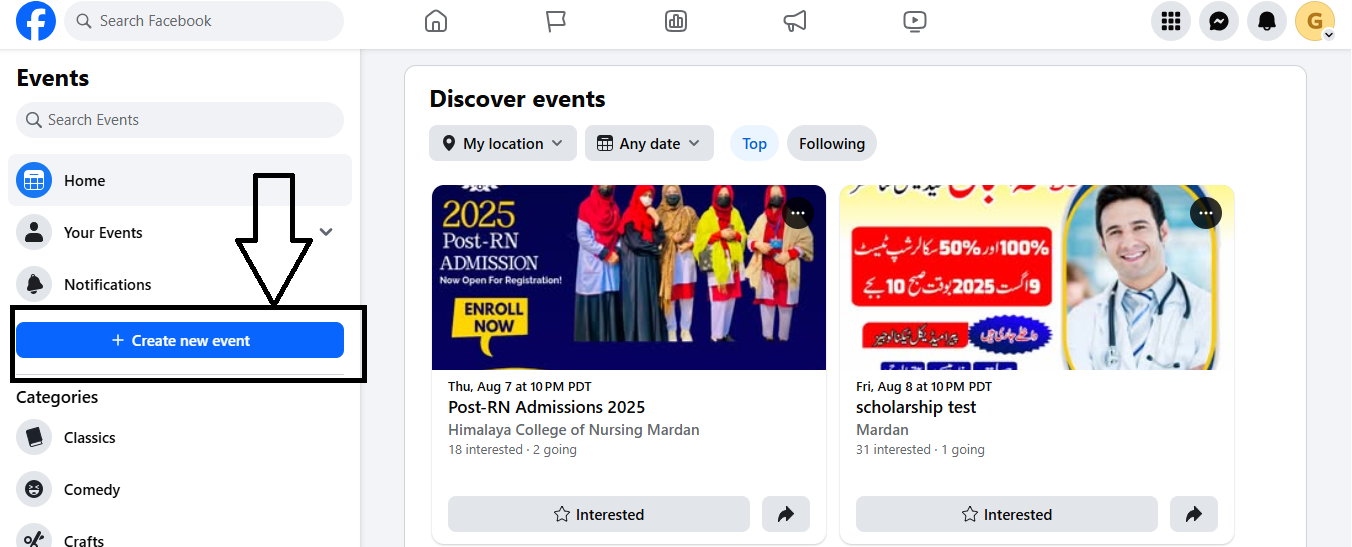
Once you’re on the Events page, click the “+ Create New Event” button. Facebook will ask you to choose between creating an online or in-person event. This is the first official step in how to create Facebook events for your brand, business, or community.
Step 3: Choose Event Type (Online or In Person)
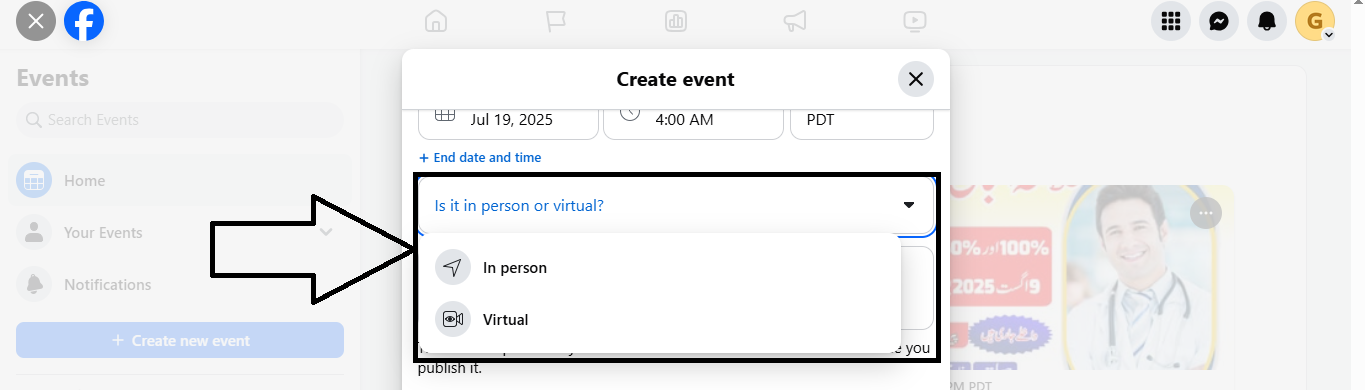
Decide whether your event will take place online (like a webinar or virtual class) or in person (like a store opening or local meetup). Choosing the correct format ensures Facebook shows the right options and promotes your event to the right audience. You can also add event links or physical locations accordingly.
Step 4: Add Basic Details (Name, Date, Time)
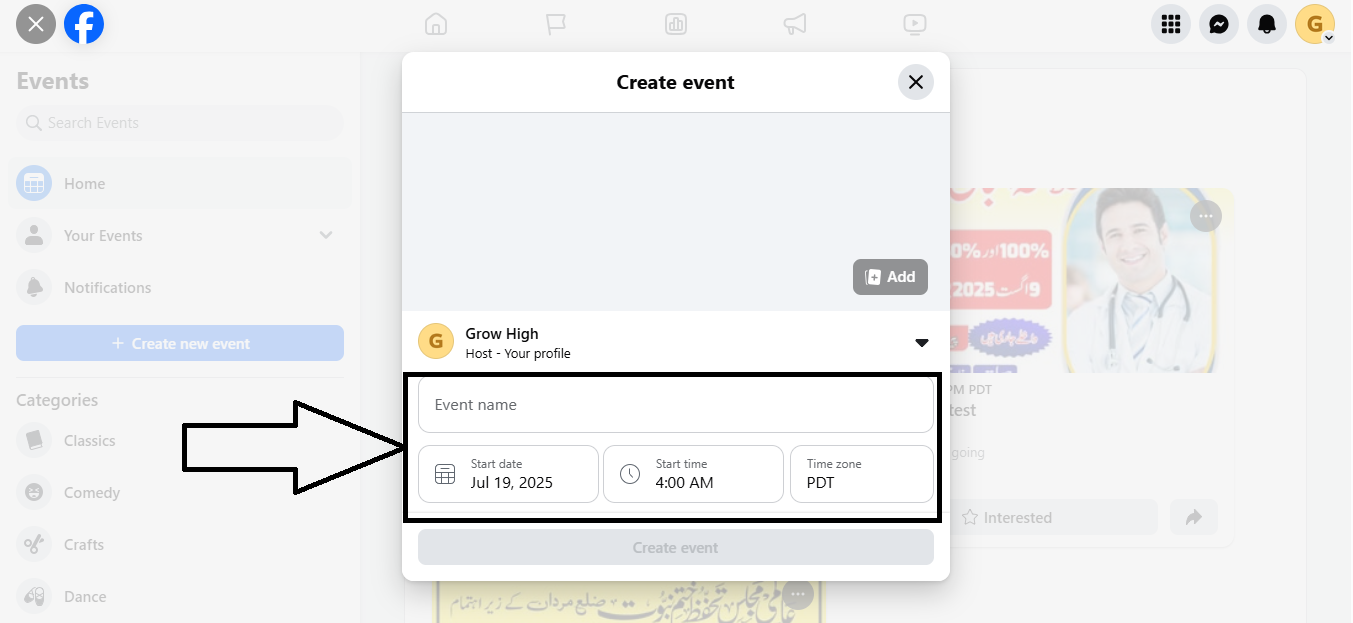
Enter a clear event name that tells people what it’s about. Next, choose your event date and start time, and if needed, set an end time too. Use a catchy title that grabs attention and matches your brand. Make sure the timing is convenient for your target audience, especially if it’s online.
Step 5: Set Privacy & Permissions
Now it’s time to define who can see and join your event. You can set the event to be Public, Friends, or Private. If you’re creating an event for your business, public visibility is ideal so more users can discover it. You can also manage co-hosts and decide if guests can post or invite others.
Step 6: Upload a Cover Image
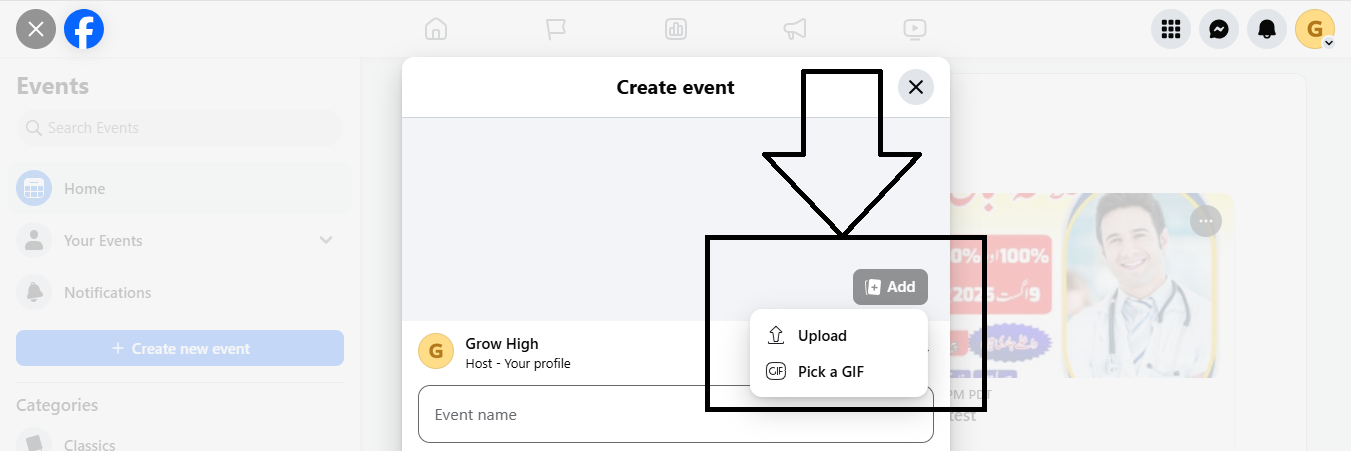
Upload a high-quality cover image that visually represents your event. Facebook recommends using an image with a 1920 x 1005 pixel size. This visual will appear at the top of your event page and in users’ feeds, so choose something eye-catching that reflects your event’s theme or purpose.
Step 7: Publish the Event
After reviewing all your event details, click “Publish” to make it live. Once published, your event will be visible to your selected audience and start appearing in relevant Facebook feeds. You can now begin promoting it through shares, invites, and even paid ads to boost visibility.
Tips to Make Your Facebook Event Stand Out
Here are tips for making your Facebook Event more attractive, clickable, and shareable—so it gets the attention it deserves and drives real results:
Use a Catchy Event Name
The first impression matters. Choose a title that is both clear and compelling. Avoid using clickbait or overly long names. Instead, create a name that reflects your event’s purpose and encourages curiosity. For example, “Summer Yoga in the Park” is more inviting than “Outdoor Health Gathering.” A well-named event is easier to find and more likely to be shared.
Add a High-Quality Cover Image
Visual appeal plays a big role in grabbing attention. A clear, vibrant cover image instantly makes your event stand out in feeds and search results. Use images that match the theme or mood of your event. If you’re hosting a workshop, show a preview of the experience. Ensure the size is 1200 x 628 pixels for best display across devices.
Write a Clear and Compelling Description
Your event description should explain what attendees can expect, who it’s for, and why it matters. Keep it engaging and easy to read by breaking it into small sections or using bullet points. Mention key details like the schedule, special guests, and what value the event offers. A strong description helps convince people to attend and share.
Include Keywords in the Event Details
Using the right keywords in your event title, description, and tags helps Facebook recommend it to the right people. Think about what your audience might search for — event type, location, industry terms, or your brand name. These keywords improve search visibility both inside and outside Facebook, making your event easier to discover.
Add a Location Tag (Even for Online Events)
Including a location, even if the event is virtual, boosts local reach. Facebook often shows events to users based on regional relevance. For example, if your event is an online webinar focused on small businesses in New York, tagging New York can help reach that audience. It adds context and increases discoverability.
Choose the Right Date and Time
Your event’s success depends partly on when you host it. Avoid competing with major holidays, popular events, or typical work hours unless your audience prefers those times. Research your audience habits — evenings or weekends often get better attendance. Choosing a convenient time shows that you respect your audience’s availability.
Enable RSVPs and Reminders
When people mark themselves as “Interested” or “Going,” Facebook reminds them before the event. This keeps your event top of mind and increases attendance. You can also track RSVP numbers to estimate how many people to expect and use that data to plan better or follow up with personalized messages.
Promote It Across Your Channels
Don’t rely only on organic reach. Share your Facebook Event in your regular posts, Facebook Stories, Groups, and even in Messenger. Expand your reach by promoting it on Instagram, X (Twitter), LinkedIn, and through your email newsletters. The more places your event is visible, the more likely it is to go viral or attract attendees outside your usual followers.
How to Promote a Facebook Event for Free (Organically)
Promoting your Facebook Event without spending money is 100% possible—with the right strategies. Organic reach can still bring great visibility and engagement if you’re consistent and creative. Here’s how:
Share the Event on Your Facebook Page
Post your event on your business or personal Page to let your audience know. Use engaging captions, emojis, and call-to-actions like “Mark your calendar!” or “Click ‘Going’ to stay updated.” Pin the event to the top of your Page for maximum visibility.
Post in Relevant Facebook Groups
Find local or niche-specific Facebook Groups that allow event promotion. Share your event in a natural way—introduce yourself, explain the value, and invite members to check it out. Don’t spam—engage like a real person.
Invite Friends and Followers
Manually invite your friends, followers, and connections. This creates early momentum and helps Facebook recommend your event to a wider audience. When more people mark “Interested” or “Going,” the event gains organic visibility.
Use Facebook Stories
Stories are a great way to grab attention quickly. Create fun visuals using the event image, countdown stickers, or polls related to the event. Link directly to the event page for easy access.
Create Countdown Posts and Reminders
Post regular reminders as the event date gets closer. Use different formats like text posts, videos, behind-the-scenes photos, or testimonials from past attendees. A countdown creates urgency and builds excitement.
Engage in the Event Page
Keep the event page active. Post updates, behind-the-scenes content, or go live to answer FAQs. Respond to comments and questions promptly. This makes your event look alive and builds trust with potential attendees.
Leverage Other Social Platforms
Cross-promote your Facebook Event on Instagram, WhatsApp Status, LinkedIn, or X (Twitter). Use simple messaging and always include the direct event link to make it easy for people to RSVP.
Add It to Your Email Signature and Newsletters
Include the event link in your email footer or as a banner in newsletters. You’re already emailing contacts—make it count by reminding them about your upcoming event.
How to Boost Facebook Events with Paid Ads
Want to reach more people and get faster RSVPs? Boosting your Facebook Event with paid ads can increase visibility and drive real attendance. Here’s a step-by-step guide to help you advertise your event effectively:
Step 1: Go to Your Event Page
Open the Facebook page where your event is listed. Click the “Boost Event” button found on your event page. This action opens a simplified version of Facebook Ads Manager, tailored specifically for promoting events.
Step 2: Define Your Goal
Choose your campaign objective. If you want people to RSVP on Facebook, select “Increase Event Responses.” If your event page is hosted elsewhere (like Eventbrite or your website), pick “More Website Visitors.” Facebook will optimize delivery to help you meet this goal.
Step 3: Select Your Target Audience
Use Facebook’s targeting tools to decide who should see your ad. You can define your audience based on location, interests, and demographics such as age and gender. For better accuracy, you can also use a Custom Audience (e.g., people who visited your site or engaged with your posts) or a Lookalike Audience to reach people similar to your existing followers or attendees.
Step 4: Set Budget and Duration
Choose your ad spend. You can set either a daily or total campaign budget depending on how much reach you want. Next, pick a duration—how many days you want the ad to run. Facebook will give you an estimated reach based on your settings.
Step 5: Customize the Ad Creative
Make sure your ad looks attractive and informative. Use a bright and clear image, preferably your event banner or a photo of past events. In your ad text, clearly mention the event name, date, and location. Highlight one big benefit (e.g., free entry, celebrity guest, giveaways) and use a clear call-to-action like “Get Your Tickets” or “RSVP Now.”
Step 6: Review and Boost
Go through your ad details one final time. Confirm that the audience, budget, and creative are all accurate. Then click “Boost Now” to launch the campaign. Facebook will review your ad, and once approved, it will begin running and reaching your selected audience.
Bonus Tip: Track the ad performance through Facebook Ads Manager. You’ll see how many people responded, clicked, or engaged. Use this data to refine future event promotions.
Best Practices for Engaging Your Event Audience
To keep your audience excited and involved, post regular updates before the event with new information or reminders. Always reply quickly to any comments or questions to show that you’re active and listening. You can also ask fun questions or run simple polls to encourage people to interact with your posts.
Behind-the-scenes content, like setup previews or sneak peeks, helps build excitement. Tag any guest speakers, performers, or partners to reach their audiences too. Encourage people who are interested to invite their friends and help spread the word.
As the event gets closer, go live to share a preview or countdown. Send reminders to keep the event top of mind. After the event, thank everyone for attending and ask for feedback to improve future events.
What are common mistakes when creating Facebook Events?
Avoiding mistakes ensures better performance and higher attendance.
Top Mistakes
- Vague or unclear event titles
- Missing important details
- No cover image
- Wrong event type selection
- Incorrect privacy settings
- No promotion strategy
- Ignoring audience interaction
- Broken or missing links
What tools and technologies support Facebook Events?
Facebook Events can be enhanced using additional tools.
Common Tools
| Tool Type | Example Use |
|---|---|
| Live Streaming | Online events |
| Email Marketing | Reminders |
| Analytics Tools | Performance tracking |
| Design Tools | Event creatives |
What are future trends in Facebook Events?
Future developments focus on AI-driven personalization and immersive experiences.
Emerging Trends
- AI-based event recommendations
- Hybrid event formats (online + offline)
- Advanced audience targeting
- Integration with eCommerce
- Automated engagement systems
Master Framework for Facebook Event Success
- Define event objective clearly
- Create optimized event structure
- Add high-quality visuals and details
- Activate organic promotion channels
- Use paid ads if needed
- Engage audience consistently
- Track KPIs and performance
- Optimize and scale using data
Implementation Checklist
- Clear event title and description
- Correct date, time, and format
- High-quality cover image
- Public visibility enabled
- RSVP tracking active
- Promotion plan executed
- Engagement maintained
- Performance monitored
What is a Facebook Event?
A Facebook Event is a feature that lets you schedule and promote an upcoming activity, meeting, or gathering—either online or in person—so people can RSVP and share it with others.
How do I create a Facebook Event?
Go to the “Events” section on Facebook, click “Create New Event,” choose your event type (online or in person), add all necessary details like name, date, and description, upload a cover photo, and click “Publish.”
Can I host online events on Facebook?
Yes, you can host live online events using Facebook Live or link to other platforms like Zoom or YouTube. Just select “Online” when choosing your event type.
How do I promote my Facebook Event for free?
You can promote it organically by:
- Sharing it on your personal and business page
- Posting in relevant Facebook Groups
- Inviting your friends and followers
- Encouraging attendees to share it
Can I run Facebook Ads for my Event?
Absolutely! You can create a Facebook Ad targeting specific demographics and interests to boost event visibility and attendance. Use Ads Manager to fine-tune your audience and budget.